


The Idiot's Guide to Mountain Bikes
By The Idiot (aka Kimberly Beekman)
I am first and foremost a skier, and I know my gear. I know which models have metal in them (and what that metal does), the particular characteristics of each brand (Wagner is known for its buttery smoothness), and can tell you without hesitation which 120 flex boots feel like a 110 (sorry, Salomon).
But when it comes to mountain bikes, the only thing I know is that I like to ride them.
Here are some confessions, for which I owe you, dear reader, a $30 therapy copay for letting me get this off my chest: I have no idea what “enduro” means. Are these, like, bikes for riding 24-hour races? Are cross-country bikes the ones you use when you’re bikepacking with your kitchen stuffed in panniers? (That sounds awful, by the way. Give me base camp! Give me cold beer!) How much travel do I want, and is it the same in front and rear? And would a carbon frame that costs more than I’ve saved in my daughter’s college fund help me get my ass up that rock wall that continually frustrates me?

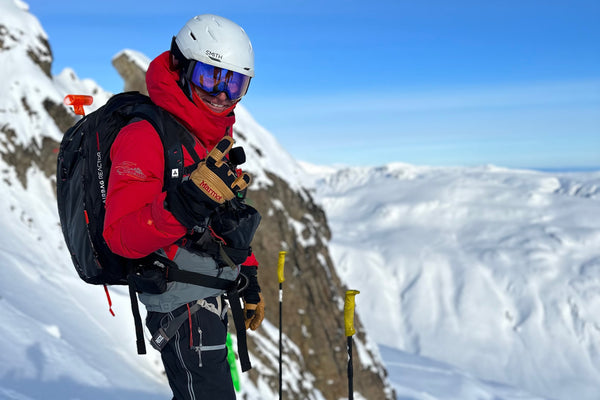
Overlooking the valley from a bike.
Thus every single time I go to the shop, which is painfully often because I don’t know how to do anything except fix a flat, I leave with my proverbial tail tucked between my legs. It goes something like this.
“Your chain won’t stay on because you bent your derailleur hanger.”
“Your chain won’t stay on because you broke your rear hub.”
“Your chain won’t stay on because you’re an idiot. And how long have your brakes been making this noise?”
“But I know how to fix a flat!” I want to yell in my own lame defense. But I don’t, because that would only further reinforce my moron-ery, and the hot tears that would likely be running down my face might warrant a call to my therapist. (And I work really hard to make my therapist think I don’t have any issues.)
So, for those of you who are in the same boat, I have compiled a cheat sheet with the help of my friend Nate Miller, who owns Ridgway Wrench bike shop, 50 minutes from Wagner Skis’ hometown of Telluride. He’s been on the other end of bike tools for more than 25 years, wins single-speed bike races like it’s his job (it is), and is such a kind human that he didn’t even call me an idiot to my face.
Bike Categories & Travel Options
Let’s start with categories. Like skis and waist widths, all categories of bikes are based on travel. Which, for those of you who are even more idiotic than I (unimaginable), that is the maximum distance your shocks travel when compressed, i.e. how much the shocks squish when you drop off a rock.

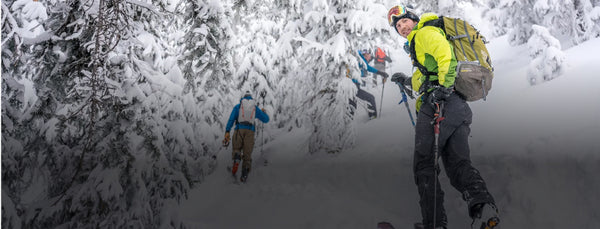
Respect the trails: a biker rides a single track high up in the San Juans
Downhill: 180-220 mm rear travel; 180-200 front travel
These are exactly what they sound like: Built for one thing and one thing only. They’re super heavy, with enough suspension to land serious air. “They’re downhill only, not meant to go up,” Miller said. “These are for the guys who ride the chairlift all day with full face helmets and all the pads.” In short, this type of bike requires full tattoo sleeves and is not suited to the vast majority of riders.
Enduro: 150-160 mm rear travel; 150-180 mm front travel
These bikes are one step toward an all-around trail bike from downhill, but still mostly built to go down. They will go uphill grudgingly—but they’re heavy, with lots of suspension. They’re good for park and chairlift riding. “You can ride them uphill,” Miller said, “but most people don’t.”
Trail: 120-140 mm of rear travel; 130-150 mm rear travel
“These are the bikes that do everything well,” Miller said. It’s right between an enduro and cross-country bike (see below) in that is has enough travel to make it great on the downhill yet is light enough to go long distances and up big elevation. “These are for the riders who go out on longer rides, like bring-a-sandwich-and-a-rain-coat kind of rides,” he said. “The geometry is really good, they climb really efficiently, and are fast on the down. More travel does not mean more speed.” This is the most balanced bike that most riders want to be on. Questions to ask yourself when shopping in this category are, “Are you jumping off stuff?” “Do you go full speed, balls to the wall, where you need more travel to support you?” As the prices go higher, the weight drops accordingly.
Cross-Country: 100-120 mm front and rear travel; or front suspension only (hardtail)
These bikes are lighter, quicker on the up, and more work on the down; some people will prefer this bike if they know they will not be pushing it as hard on the downhill. They have less travel, and some have front suspension only. “Do you ride once or twice a week for a couple of hours, or are you going to really want to explore?” Miller said. If the answer is the former, cross-country might be a good option. Hardtails are also great for people who are learning because they don’t absorb as much impact and therefore force you to learn good line choice and technique. “If you’re riding down a rock garden on a hardtail, you’re gonna pick and choose a better line, and that really does help you learn how to ride a bike and have good body position and bike handling.”
After talking it over with Miller, I definitely categorize myself as the “trail” rider. But the next question is, is carbon worth the money? Will it help me get up stuff?
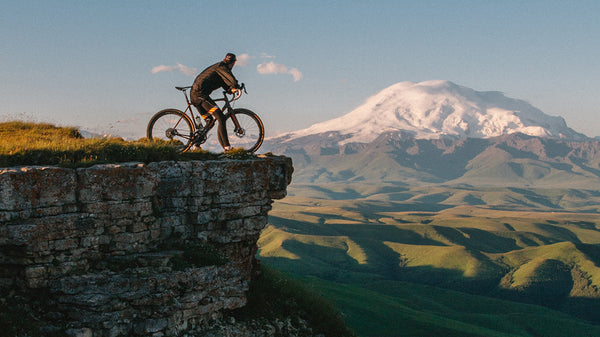
Photo by Dmitrii Vaccinium/Unsplah
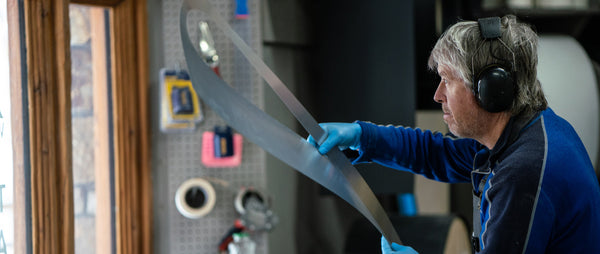
Bike Materials
Carbon vs aluminum
“Carbon will have a better feel to it,” Miller said. “Carbon is a little damper and will disperse more energy before it gets to your butt and bones. It will help you maneuver the bike a little bit.” But on the other hand, we’re talking only a pound or two. “If you’re a strong human being, that’s not really all that noticeable,” he said. It’s basically about how much time you spend on your bike and how much money you have to spend. (So, in short, I am an idiot for blaming my heavy aluminum bike when I fall over on the technical uphill. See “technique tips.”) If you are looking at a hardtail frame only, however, then definitely choose carbon over aluminum, or, if you can afford it, Titanium (oh so smooth).
For me, riding with flats is akin to riding a horse without stirrups. I do not understand how anyone does this. But I asked Miller what his thoughts are, because I know a lot of great riders who (inexplicably) run flats.
Bike Pedals
Clipless vs flats
Clipless are more efficient. You can pull up and push down. Flats are easier to put a foot down before you fall over, but they also mean you’re not “one with the bike.” Regardless of the style of bike you choose, here’s Miller’s list of must-haves, both in a bike and on your person for the ride.
Must-haves
- Tubeless tires: These have less rotational weight and allow you to ride with reduced air pressure because you’re not worried about pinching a tire. Less air pressure means the tires also absorb more impact and make the ride smoother.
- Seat-post dropper
- Single chain ring drive train (one shifter): Gives you more torque from the drive train to keep those wheels on the ground.
- Hydraulic brakes (vs mechanical): Mechanical brake cables stretch, require more adjustment, and get spongy; and the pads wear out quickly. Hydraulic fluid also loses its properties—accumulating moisture and getting dirty, thus lowering the boiling point—which is why you should take it to a shop and bleed the brakes as soon as they start feeling less efficient or making noise.
- Pump: Co2 cartridges are easier to quickly add air to a tire, but in my experience, you need a hand pump, too. Because if your tire is leaking and your Co2 is spent, you’ve got a long walk ahead of you.
- Spare tube: Sometimes if you get a flat on a tubeless tire, the seal will be broken and you may need more goo (such as Stan’s sealant) inside. (Sealing a tire on the trail will work sometimes, but be patient. it may take a few stops to get the sealant to do its thing. And if it doesn’t, put that tube in. Also, just in case you didn’t hear me earlier, this is something I know how to do!)
- Tire levers: “Pedros are the best,” Miller says.
- Multi-tool with chain breaker, a few extra chain links, and a quick link
- Gorilla tape: This is a quick fix for a broken zip tie or to patch a large slash or puncture in the tire itself (called a “tire boot”). Keep a bit wrapped around your hand pump.

Mountain biking can get you to some pretty unique locations quicker than walking there.
Bike Technique Tips
Now, some technique.
Tips for getting up shit
You want to be a couple clicks down from easy, and to use your lower gears as only a bailout, Miller said. The more torque you have, the more you’ll keep your rear wheel from spinning out. Shift your weight forward, float above your saddle, and engage your core. You can even drop your seat to force yourself off the saddle, and then you have freedom to move your weight to stay centered on the bike. “I do that sometimes if there’s some weird move on the climb coming up where I need to shift my weight back and forth. I get that seat out of the way,” Miller said.
When it comes to going up switchbacks, shift to an easier gear, aim for the outside and cut through the middle.
Tips for getting down shit
“First of all, don’t look straight down at your tire,” Miller said. “Look 10 feet out, and look at what’s coming next. It’s there before you know it.” And, just like in skiing, look at where you want to go—the space between the giant boulders—instead of at the boulders themselves.
Before you even start your ride, make sure your tires are inflated properly—here’s a guide for tubeless tires. The lighter you are, the less you need, and vice versa. (The type of terrain you’re riding also determines the pressure, but that’s a bit more complicated to get into here.) “If you feel the rim or feel the tire fold in a turn, you’re too low,” Miller said.
Also, make sure you unlock your shocks before the descent. “We have all done this; worst case is you can do damage your suspension, resulting in a blown damper that gives your shock a pogo stick feel,” Miller said.
Make sure you’re braking before the turn, not the whole time. Feather your rear brake; don’t grab your front! Use speed to your advantage—the more you have, the more momentum you’ll have to get over small rocks.

Single track downhill can be a lot of fun.
Have trust in your tires. Relax—don’t have a death grip. “If you’re totally clenched, all the energy from the trail is going to go into you, and that’s when you have an accident.” You also want your weight forward on the front wheel, just like skiing, to help that front tire work and find the balance.
To go down switchbacks, anticipate the corner. Do most of your braking before the turn. Feather the rear brake through the turn as needed. The approach is the same for uphill: Aim outside and come through the middle. “I tend to look at corners and turns from the view of a race car driver (I’m an F1 fan/nerd),” Miller said. “What is the fastest way through the turn? Watch and learn. It’s the same as watching a downhill ski racer.”
I hope you feel like less of an idiot now. (You’re welcome.) Now go gear up and get out there.
--
Article by Kimberly Beekman
Kimberly Beekman is the former editor-in-chief of the late, great Skiing Magazine (RIP), and a longtime editor of SKI Magazine before that. She currently uses the title of “freelancer” as a beard to ski powder all over the world. She lives in Steamboat, Colorado, with her wonderful daughter and terrible cat.
