


The Complete Ski Fitness Plan: Strength, Mobility & Injury Prevention
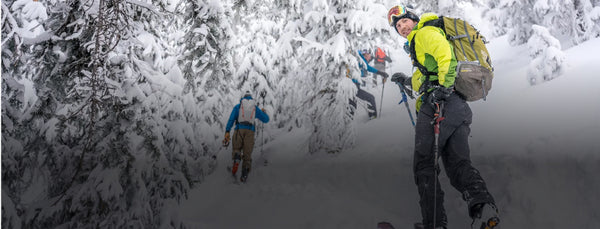
It’s never too early to start thinking about ski fitness.
In a perfect world, we’d all have the time, energy, and focus to stay in shape year-round, but life happens. A few years ago, I created a 6-week ski fitness program (and a 6-week ski fitness program with no equipment) with high volume and intensity to deliver maximum results quickly. Since then, I’ve expanded my coaching and fitness approach. This new program is longer: 9 to 12 weeks and beyond, starting with the basics to build proper form, strengthen key muscle groups, and improve work capacity while preventing injury.

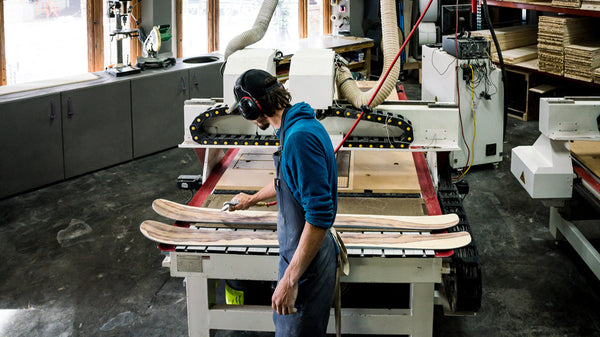
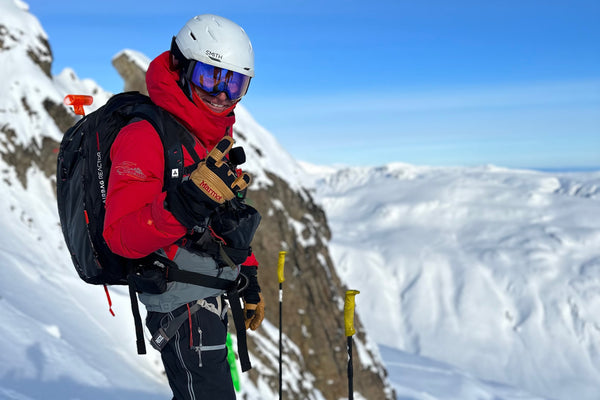
Getting fit now means better skiing later. Photo: Melissa Plantz
Skiing is the ultimate compound movement, engaging multiple muscle groups and joints while demanding isometric strength, explosive power, and a strong core for balance and control. Not an easy feat, right? Replicating how the body recruits these muscles on the slopes is challenging, so the goal of this program is to strengthen primary muscle groups, train secondary muscles to do their part, and combine them into movements that translate directly to skiing.
A key objective of any fitness program is injury prevention. While no amount of training can make your ACL untearable, strong muscles help support your joints under stress. By properly engaging your glutes and hamstrings, you improve overall knee health, reduce injury risk, and increase both longevity and enjoyment on the mountain.
Terms You'll See
Before diving into the core of this program, let’s get on the same page with some key terms. A quick search might turn up other definitions, but here’s how we’ll use them:
Flexibility vs. Mobility
Flexibility is the ability of a muscle or joint to stretch and lengthen. It’s a passive range of motion, achieved with external assistance, like a stretch or prop. Flexibility helps maintain posture, prevent injuries, and improve overall range of motion.
Mobility is the ability to actively move a joint through its full range of motion without assistance. It combines flexibility with strength, coordination, and stability. Mobility is essential for everyday activities, from reaching for objects to walking and running.
In short, flexibility is passive, while mobility is active and requires strength and control. Both are crucial for physical health, and maintaining strength throughout each joint’s full range of motion is the ultimate goal.

Isometric vs. Dynamic vs. Explosive Exercise: What’s the Difference?
When it comes to building strength, improving endurance, or recovering from an injury, not all exercises are created equal. Two fundamental types of muscle contractions—isometric and dynamic—offer unique benefits and work in very different ways. Understanding how they function can help you design a smarter, more balanced training routine.
What are Isometric Exercises?
Isometric exercises involve contracting a muscle without changing its length. That means the joint angle stays the same, and you’re essentially holding tension without movement. Examples include: plank holds, wall sits, and hand grip squeezes.
How they work: During an isometric contraction, your muscle fibers generate force but the joint itself doesn’t move. Think of it like pressing against a wall—you’re working hard, but nothing is actually shifting.
Benefits of Isometric Exercises: Isometric exercises improve muscle strength and endurance, enhance joint stability, are low impact on the joints (reducing strain), and are ideal for rehabilitation and injury prevention.

Planks are a pain to do but worth doing well.
What are Dynamic Exercises?
Dynamic exercises involve contracting a muscle while changing its length; in other words, your muscles and joints move through a range of motion. Examples include squats, push-ups, bicep curls, and running.
How They Work: Dynamic movements consist of two phases: the concentric phase, where the muscle shortens while moving the joint (such as lifting a weight), and the eccentric phase, where the muscle lengthens while controlling the movement (such as lowering the weight back down).
Benefits of Dynamic Exercises: Dynamic exercises promote muscle hypertrophy (growth), increase range of motion, boost cardiovascular health, and burn more calories compared to isometric exercises.
What are Explosive Exercises?
Explosive exercises are dynamic movements designed to improve power by combining strength and speed, focusing on generating maximum force in the shortest possible time.
Examples of explosive exercises include:
- Plyometrics - Box jumps, depth jumps, hurdle hops, and standing broad jumps
- Olympic Lifts - Cleans, snatches, power cleans, and power snatches
- Squat Variations - Squat jumps, box squats, Bulgarian split squats, and pistol squats
- Other Exercises - Medicine ball throws, kettlebell swings, push-ups with explosive movements, pull-ups with explosive movements, sprint drills, burpees

A skier demonstrates a pistol squat.
How They Work: These workouts enhance rapid muscle activation through high-velocity actions like jumping, sprinting, and throwing, training fast-twitch muscle fibers to boost athletic performance and overall power.
Benefits of Explosive Exercise: Explosive exercises offer several key benefits. For athletic performance, they are crucial in sports that require quick reactions, such as jumping, cutting, and sprinting. They also enhance general fitness by improving functional strength for everyday activities that demand short bursts of effort. Additionally, explosive training can help reduce the risk of injury by improving muscle responsiveness and neuromuscular control.
The Bottom Line
In the end, preparing for ski season isn’t just about hitting the gym, it’s about training smart with movements that mirror the demands of the mountain. A program that combines isometric, dynamic, and explosive exercises ties it all together, giving you the endurance to hold strong positions, the mobility to move fluidly through turns, and the power to react in an instant. This balance doesn’t just improve performance; it also reduces the risk of fatigue and injury, so you can stay out longer and ski harder. By layering these training styles, you’re not just getting fit—you’re building the strength, stability, and resilience that let you truly thrive on snow.
Tools You'll Need
I tried to keep this simple, with basic fitness gear that you may have at home or should be able to find at any good gym.
Here’s what you’ll need:
- Stopwatch or interval app
- Barbells (BB): you’re going to want 2 in weight ranges from 5-25 lbs depending on your starting fitness and how hard you want to push yourself.
- Kettlebells (KB): you can fake these but not well, RDL’s, Swings and Dead lifts all work better with KB’s. Depending on your size, something between 20 and 60 lbs is ideal.
- Plyo Box: jumps, step-ups, step-downs and seated movements all benefit from a decent plyo box. They are easy to substitute though so don’t sweat it.
Bonus gear:
- Training or yoga mat: it’s just better than being on the floor, get a good one, not too soft so footing isn’t compromised and not too smooth that it is slippery.
- Weighted vest: nothing better to elevate heart rate, strengthen your core and mimic a pack than walking with a weight vest. I prefer ones where the weight is easily adjustable.
Phase 1: Build the Base
The Exercises
 Jake demonstrates a squat in the workout videos (links below).
Click on the link below each exercise block if you are uncertain of what it involves.
Squats
• Air
• Goblet
• Jump
• Hold
(view these moves here)
Plyo-boxes
• Step-ups
• Box jumps
• Toe touches/step downs
• Curl to Arnold press
• Bulgarian split squats
(view these moves here)
Kettlebells
• Swings
• RDL
• Sumo DL
• Deficit DL
(view these moves here)
Bodyweight
• Reverse lunge
• Frog hop
• Split jump
• Wall sit
• Hamstring bridge
• Planks
• Push-up
• Renegade row
• Mountain climbers
(view bodyweight, hamstring bridges, and plank moves here)
The Format
This is built in three phases of 4-weeks each. Progress is based on a few factors and is highly personal. More isn’t necessarily better. If one workout has made you so sore or tired that you can’t do the next, back off! Listen to your body and adjust the knobs appropriately. It’s impossible to coach through a blog, so remember these are guidelines to help you set the course and make progress. Move forward when a phase feels manageable for 3-4 days/week consistently. Sore muscles aren’t the only sign of progress and lack thereof doesn’t necessarily mean you haven’t progressed.
Sets and reps are noted in a SxR format. So, 5x8 would be 5 sets of 8 reps of a given exercise. Rest between sets is important, give yourself enough time to attack each set fully, unless the rest is designated. These movements are designed for increasing heart rate as well as strength, pay close attention.
Phase 1: The workout
In this phase we will learn and master movements, slowly add volume and intensity, and focus on general fitness and strength. Each week will be a repeat of the previous, with a slow increase in reps and sets. I recommend starting with three days per week if you’re coming off the couch and four days if you’ve been getting after it all summer.
Each workout is split into three sections:
• Warm up = 5-10 minutes of light cardio/stretching/movement
• Workout
• Cooldown = stretch, walk, move
In a perfect world, you train every other day, but none of these workouts should be so devastating to your body that you can’t do back to back days. If something feels too much, decrease the volume or intensity. Doing less on more days is better than doing so much on one day that you can’t train the rest of the week. Additionally, walking, running and bike riding as much as you have time for will help offset DOMS (delayed onset muscle soreness), increase overall fitness and speed recovery. Yoga is a great thing to practice as well, if you don’t have access to a local studio, here is a simple ski related flow to keep you moving.
PHASE 1/WEEK 1


Phase one wraps up here. If you’re feeling strong, healthy, and ready for more, move into phase two, which adds more weight, introduces new movements, and increases volume. Keep up walking, biking, yoga, and any other recovery practices you enjoy.
--
Phase 2: Intensity and Volume
We’re four weeks in. You should have a solid base, understand the individual movements, and hopefully feel stronger. In Phase 2, we’ll keep the same basic movements but increase both intensity and volume. One way we’ll do this is by adding sets and reps; another is by combining exercises into complexes. For example, in Phase 1 you may have done 3 sets of 8 squats, followed by 3 sets of 8 lunges. In this phase, we’ll do 3 sets of a single complex—one squat, one lunge, one jump—repeated for the set. This approach trains your muscles for the reality of skiing, where multiple muscle groups work together repeatedly as you move down the mountain.
We’ll also introduce ladders, so you will see the following: 10-1 Ladder: KB Swing/RDL
In round one, you would perform 10 swings and 1 RDL, in round two you would perform 9 swings and 2 RDL’s, round three 8 and 3 until you get to 1:10. Make sure to rest between and get ready, these sneak up on you!
You will notice a similar pattern of slow increases in sets/reps over the phase, we are building work capacity as we get stronger. Again, if one day is too much, scale it back. More isn’t better unless you can show up to perform the next day. This is a long walk, not a sprint to the end.


--
Phase 3: Power, Endurance, and Longevity
We’re 8 weeks in and you should have a solid foundation and fitness level at this point. You have trained your muscles and joints in the basic movements and we’re ready to put in some harder work to get us through the season ahead.
In this phase, we’re cutting out the optional fourth day and encouraging you to get outside and move. Walk, hike, ski, bike, put all this work into action and have some fun. The three weekly sessions will get harder, with more volume and intensity each day. They’ll also be consistent—no more weekly variety. This is about repetition, where the real gains start to show.
Day 1 focuses on pure strength, tackling the hardest work while you’re fresh. Day 2 emphasizes power movements, and Day 3 targets work capacity and injury prevention. This phase can continue all winter—scale weights as you get stronger, add a set or a few reps, and balance with your skiing. Don’t expend all your energy in the gym and risk being too tired to ski on the weekend. Conversely, push harder in weeks when you won’t be outside much.
Strength and fitness are perishable, stop using them, and you’ll lose them fast. Choose weights wisely: Day 1 should be moderately heavy, Day 2 lighter for power, and Day 3 lighter for endurance and injury prevention.
Watch our Farmer carries description video here.
PHASE 3/WEEKLY WORKOUT

--
Article by Jake Hutchinson
Jake has spent more than 25 years working as an avalanche professional. He is currently a lead instructor for the American Avalanche Institute, an avalanche dog handler and trainer and an avalanche safety consultant to the resort and rescue communities. Off the snow, Hutchinson is a Certified Instructor and former Head of Instructor and Seminar Development for Gym Jones in Salt Lake City. He is currently involved in private personal training with an emphasis on high level functional fitness for mountain and military athletes.
